> ## Documentation Index
> Fetch the complete documentation index at: https://docs.intelleap.app/llms.txt
> Use this file to discover all available pages before exploring further.
# Code Metrics
Code Metrics allow custom evaluation logic to be implemented using Python.
Metric code is executed during testing and returns an evaluation result that can be used as part of the testing workflow.
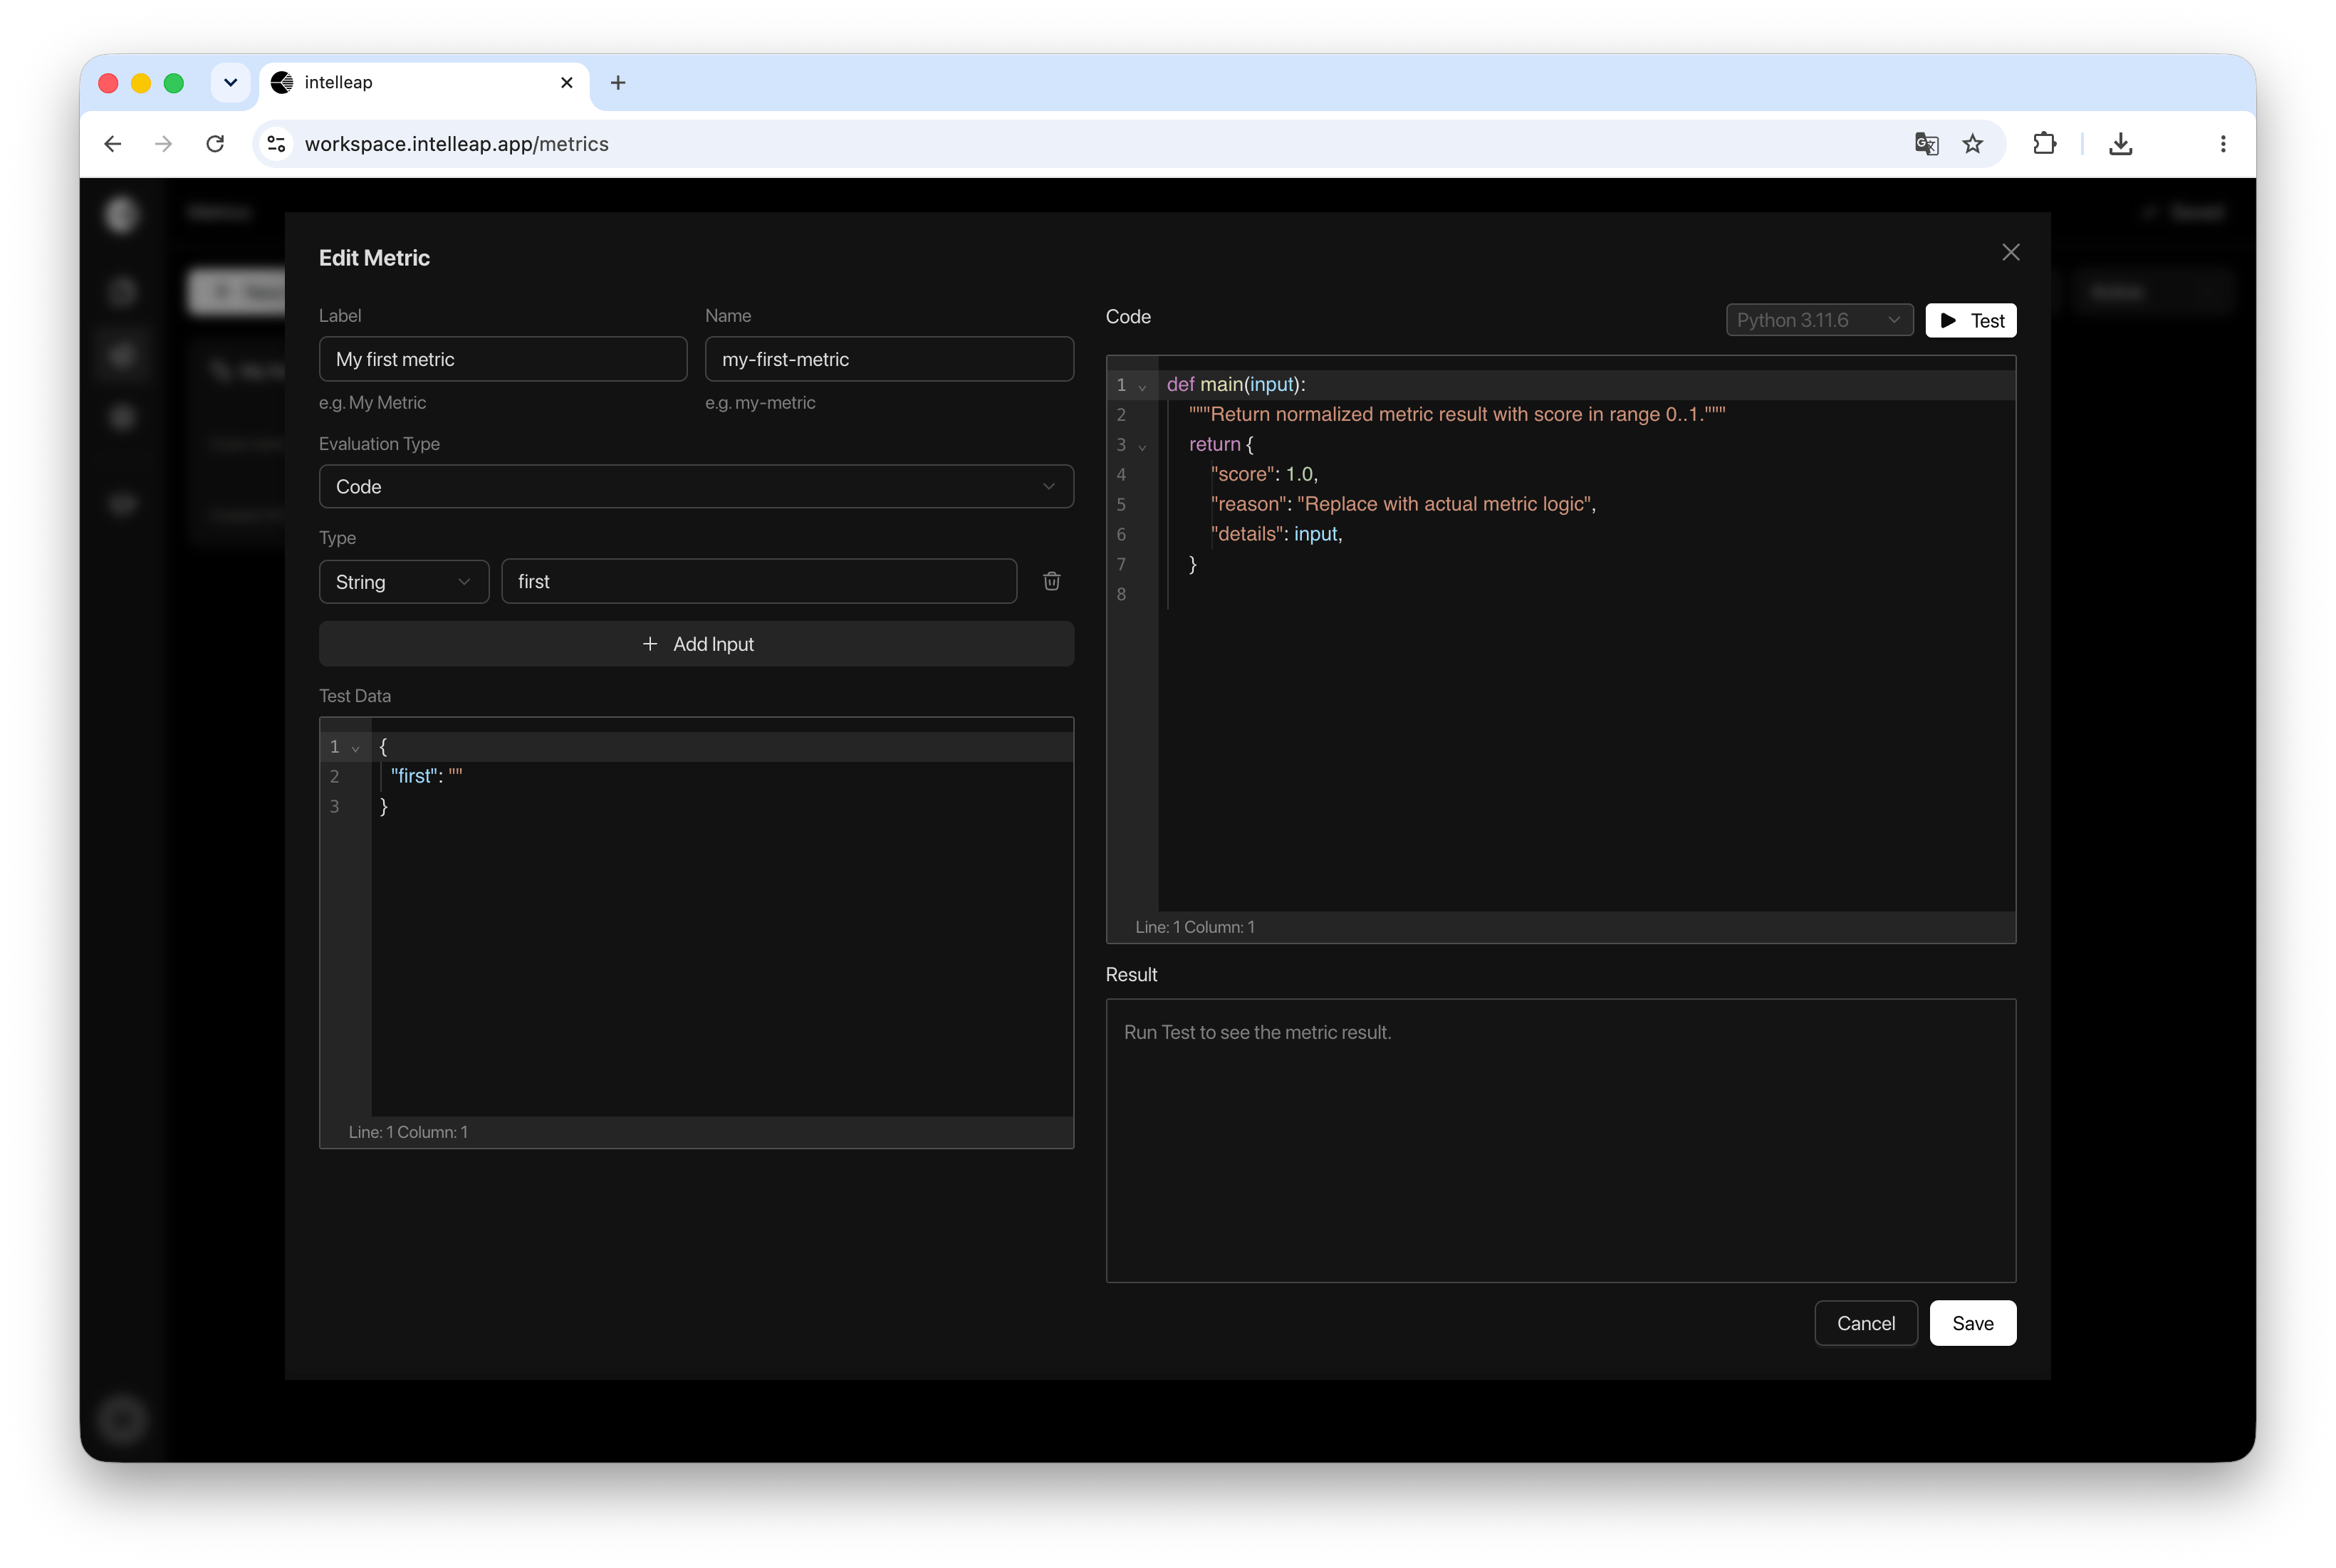
All Code Metric configuration, testing, and editing is performed within a single metric editor dialog.
 ## Creating a Code Metric
To create a new metric:
Open the Metrics section.
Click **New Metric**.
Select **Code** in the **Evaluation Type** field.
Once the evaluation type is selected, Code Metric configuration becomes available.
## Basic Configuration
Each metric includes the following settings:
* Label
* Name
* Evaluation Type
These values are used to identify the metric and make it available within Testing workflows.
## Inputs
Code Metrics can receive custom input parameters.
Each input consists of:
* Data Type
* Input Name
To add a new parameter, click **Add Input**.
Defined inputs become available in both Test Data and the metric code.
## Test Data
The Test Data section contains the sample data used for testing the metric.
Test data is configured as JSON.
The JSON structure typically matches the inputs defined in the Inputs section.
Test Data allows metric behavior to be validated before the metric is used in Testing.
## Python Code
Evaluation logic is implemented using Python.
Currently, the only supported runtime is:
```text theme={null}
Python 3.11.6
```
The code receives input data from the Test Data section and executes custom evaluation logic.
Code Metrics can be used for:
* Custom validation rules
* Output analysis
* Scoring systems
* Constraint checking
* Business-specific evaluation logic
## Example Code Metric
The following example shows the default structure of a Code Metric:
```python theme={null}
def main(input):
"""Return normalized metric result with score in range 0..1."""
return {
"score": 1.0,
"reason": "Replace with actual metric logic",
"details": input,
}
```
Every Code Metric must define a `main()` function.
Code Metrics currently run on Python 3.11.6 and must expose a `main(input)` function.
The function receives the metric input data and returns the evaluation result.
The returned object typically includes:
* score — metric score between 0 and 1
* reason — explanation of the result
* details — additional diagnostic information
## Testing a Metric
To test a metric, click **Test**.
The current version of the code is executed using the data provided in the Test Data section.
Testing is performed directly inside the metric editor and does not require navigating to another page.
## Result
After a test run completes, the output is displayed in the **Result** section.
Depending on the execution outcome, the result may contain:
A successful metric output.
Runtime or validation feedback from a failed test run.
Diagnostic data returned by the metric code.
The Result section helps validate metric behavior before saving the metric.
## Using Code Metrics in Testing
After saving, the metric becomes available in the Testing workflow.
To attach a metric to a Test Suite, use:
```text theme={null}
Manage → Metrics
```
Once attached, the metric is executed automatically whenever tests are run.
## Creating a Code Metric
To create a new metric:
Open the Metrics section.
Click **New Metric**.
Select **Code** in the **Evaluation Type** field.
Once the evaluation type is selected, Code Metric configuration becomes available.
## Basic Configuration
Each metric includes the following settings:
* Label
* Name
* Evaluation Type
These values are used to identify the metric and make it available within Testing workflows.
## Inputs
Code Metrics can receive custom input parameters.
Each input consists of:
* Data Type
* Input Name
To add a new parameter, click **Add Input**.
Defined inputs become available in both Test Data and the metric code.
## Test Data
The Test Data section contains the sample data used for testing the metric.
Test data is configured as JSON.
The JSON structure typically matches the inputs defined in the Inputs section.
Test Data allows metric behavior to be validated before the metric is used in Testing.
## Python Code
Evaluation logic is implemented using Python.
Currently, the only supported runtime is:
```text theme={null}
Python 3.11.6
```
The code receives input data from the Test Data section and executes custom evaluation logic.
Code Metrics can be used for:
* Custom validation rules
* Output analysis
* Scoring systems
* Constraint checking
* Business-specific evaluation logic
## Example Code Metric
The following example shows the default structure of a Code Metric:
```python theme={null}
def main(input):
"""Return normalized metric result with score in range 0..1."""
return {
"score": 1.0,
"reason": "Replace with actual metric logic",
"details": input,
}
```
Every Code Metric must define a `main()` function.
Code Metrics currently run on Python 3.11.6 and must expose a `main(input)` function.
The function receives the metric input data and returns the evaluation result.
The returned object typically includes:
* score — metric score between 0 and 1
* reason — explanation of the result
* details — additional diagnostic information
## Testing a Metric
To test a metric, click **Test**.
The current version of the code is executed using the data provided in the Test Data section.
Testing is performed directly inside the metric editor and does not require navigating to another page.
## Result
After a test run completes, the output is displayed in the **Result** section.
Depending on the execution outcome, the result may contain:
A successful metric output.
Runtime or validation feedback from a failed test run.
Diagnostic data returned by the metric code.
The Result section helps validate metric behavior before saving the metric.
## Using Code Metrics in Testing
After saving, the metric becomes available in the Testing workflow.
To attach a metric to a Test Suite, use:
```text theme={null}
Manage → Metrics
```
Once attached, the metric is executed automatically whenever tests are run.