> ## Documentation Index
> Fetch the complete documentation index at: https://docs.intelleap.app/llms.txt
> Use this file to discover all available pages before exploring further.
# Quick Start
Intelleap helps teams build, test, and evaluate prompts through a single workflow.
Getting started takes only a few steps:
Add a provider API key so Intelleap can run model executions.
Create a prompt, configure variables, scenarios, variants, and model settings.
Capture the current prompt state for Testing and Evaluations.
Execute tests, inspect outputs, and review evaluation results.
Before using Intelleap, you must connect at least one supported model provider.
Open **Account → Workspace** and click **Add Secret**.
Provide:
* Label
* Secret Key
Intelleap automatically validates the key after submission.
Once validation succeeds, the secret receives a **Valid** status and the corresponding models become available for execution in Editor and Testing.
Open the **Prompts** page and click **New Prompt**.
Enter:
* Label Name
* Description
After creating the prompt, open it in the Editor.
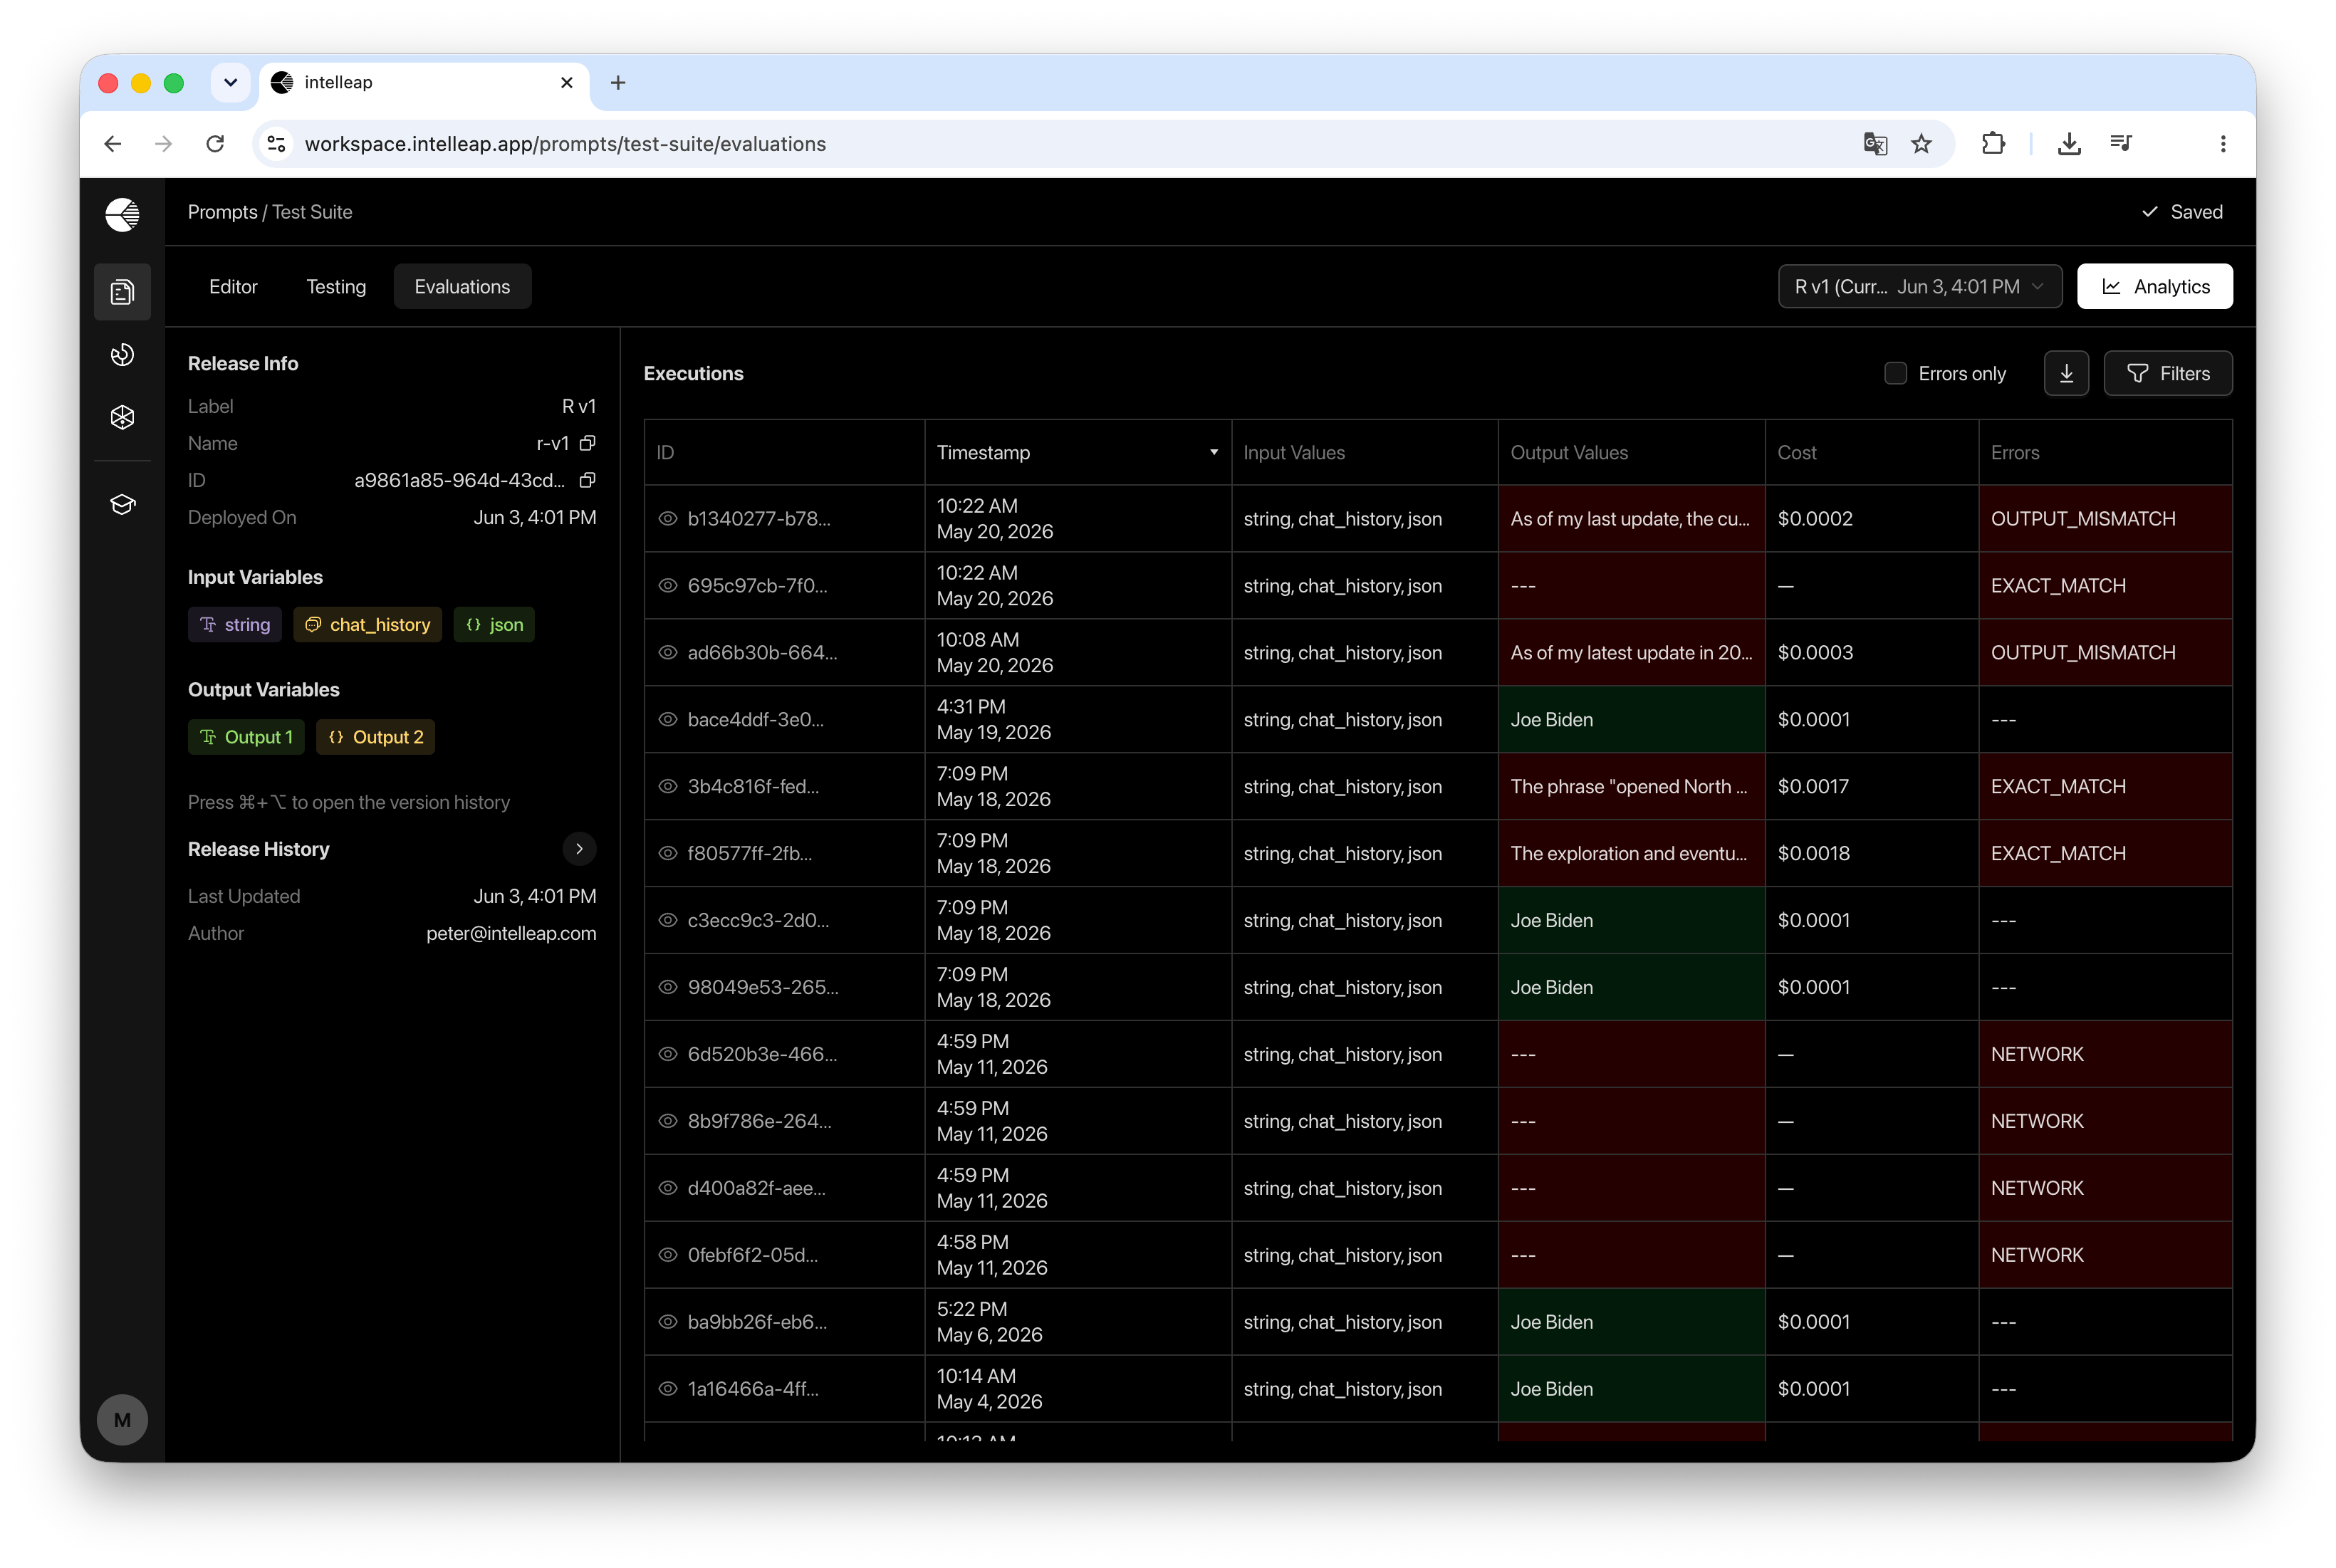
Inside the Editor:
* Create variables
* Configure scenarios
* Create one or more prompt variants
* Select model settings
* Run prompt variants
 When your prompt configuration is ready, click **Releases**.
Create a new release by providing:
* Label
* Name
* Description
A release captures the current state of the prompt and makes it available for Testing and Evaluations.
After publishing the first release, the **Testing** and **Evaluations** tabs become available.
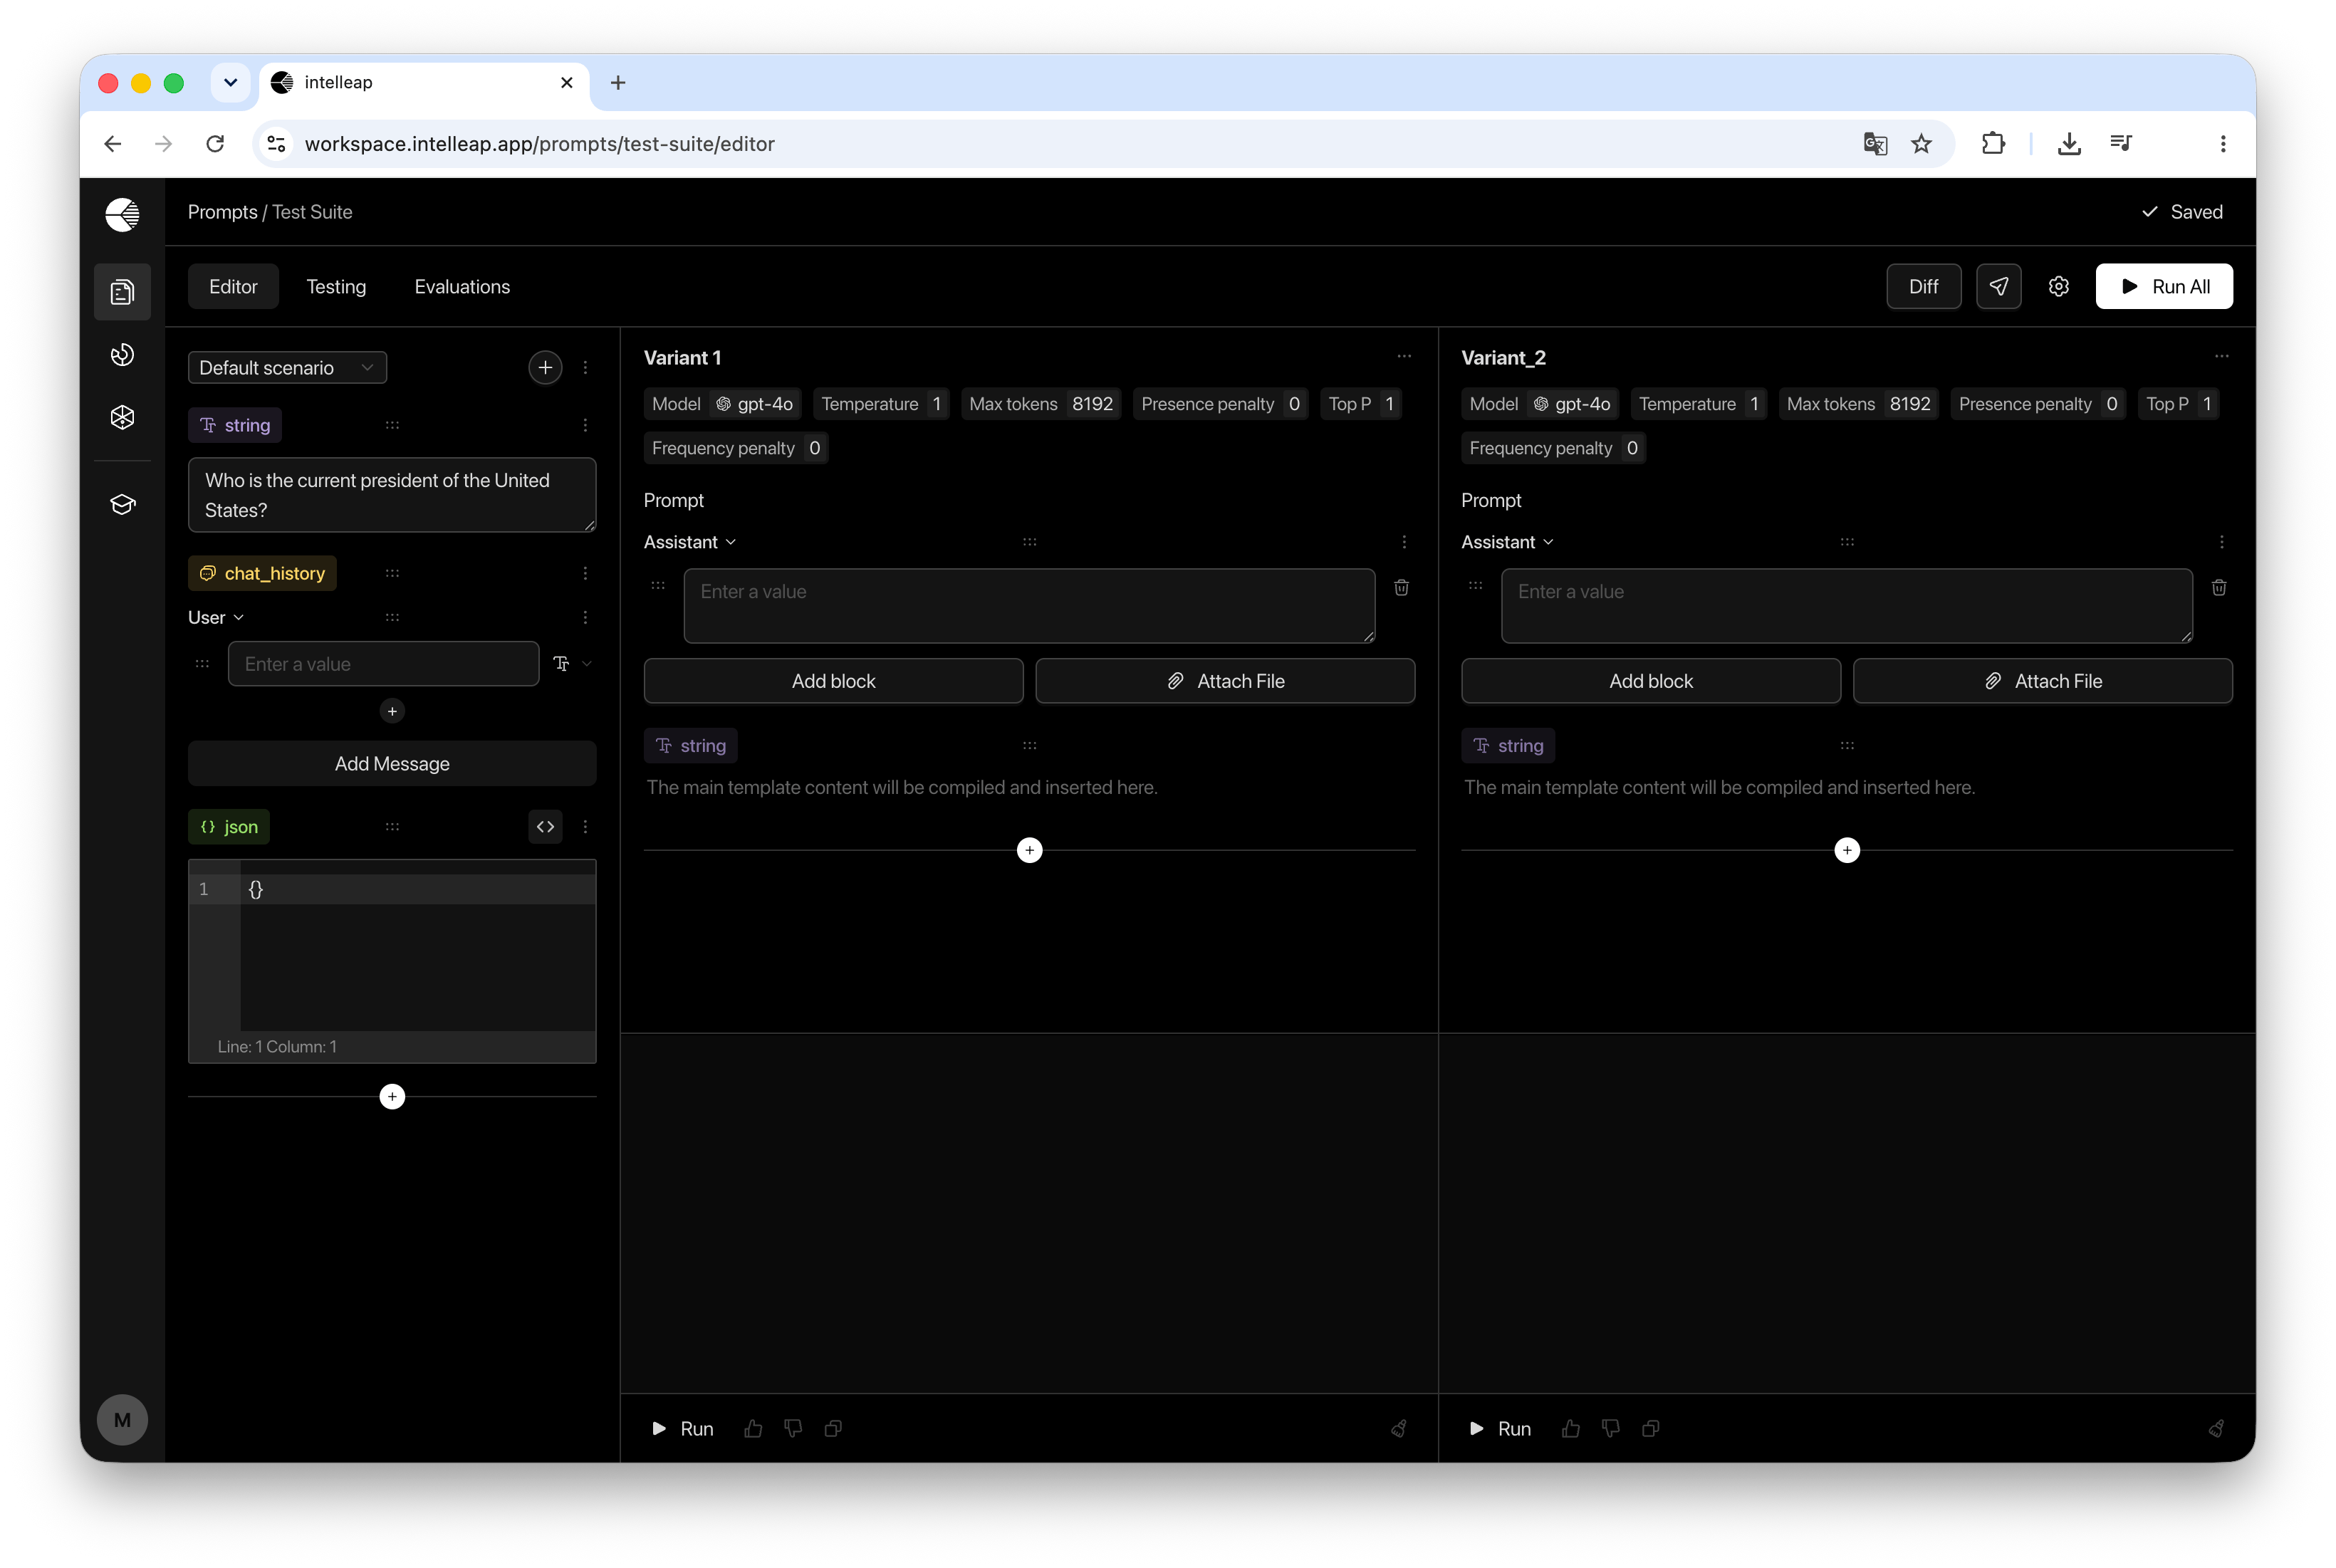
Open the **Testing** tab.
Select a release and create a Test Suite.
Configure:
* Test data
* Expected Outputs
* Metrics
Run an individual variant or execute all visible variants at once.
When your prompt configuration is ready, click **Releases**.
Create a new release by providing:
* Label
* Name
* Description
A release captures the current state of the prompt and makes it available for Testing and Evaluations.
After publishing the first release, the **Testing** and **Evaluations** tabs become available.
Open the **Testing** tab.
Select a release and create a Test Suite.
Configure:
* Test data
* Expected Outputs
* Metrics
Run an individual variant or execute all visible variants at once.
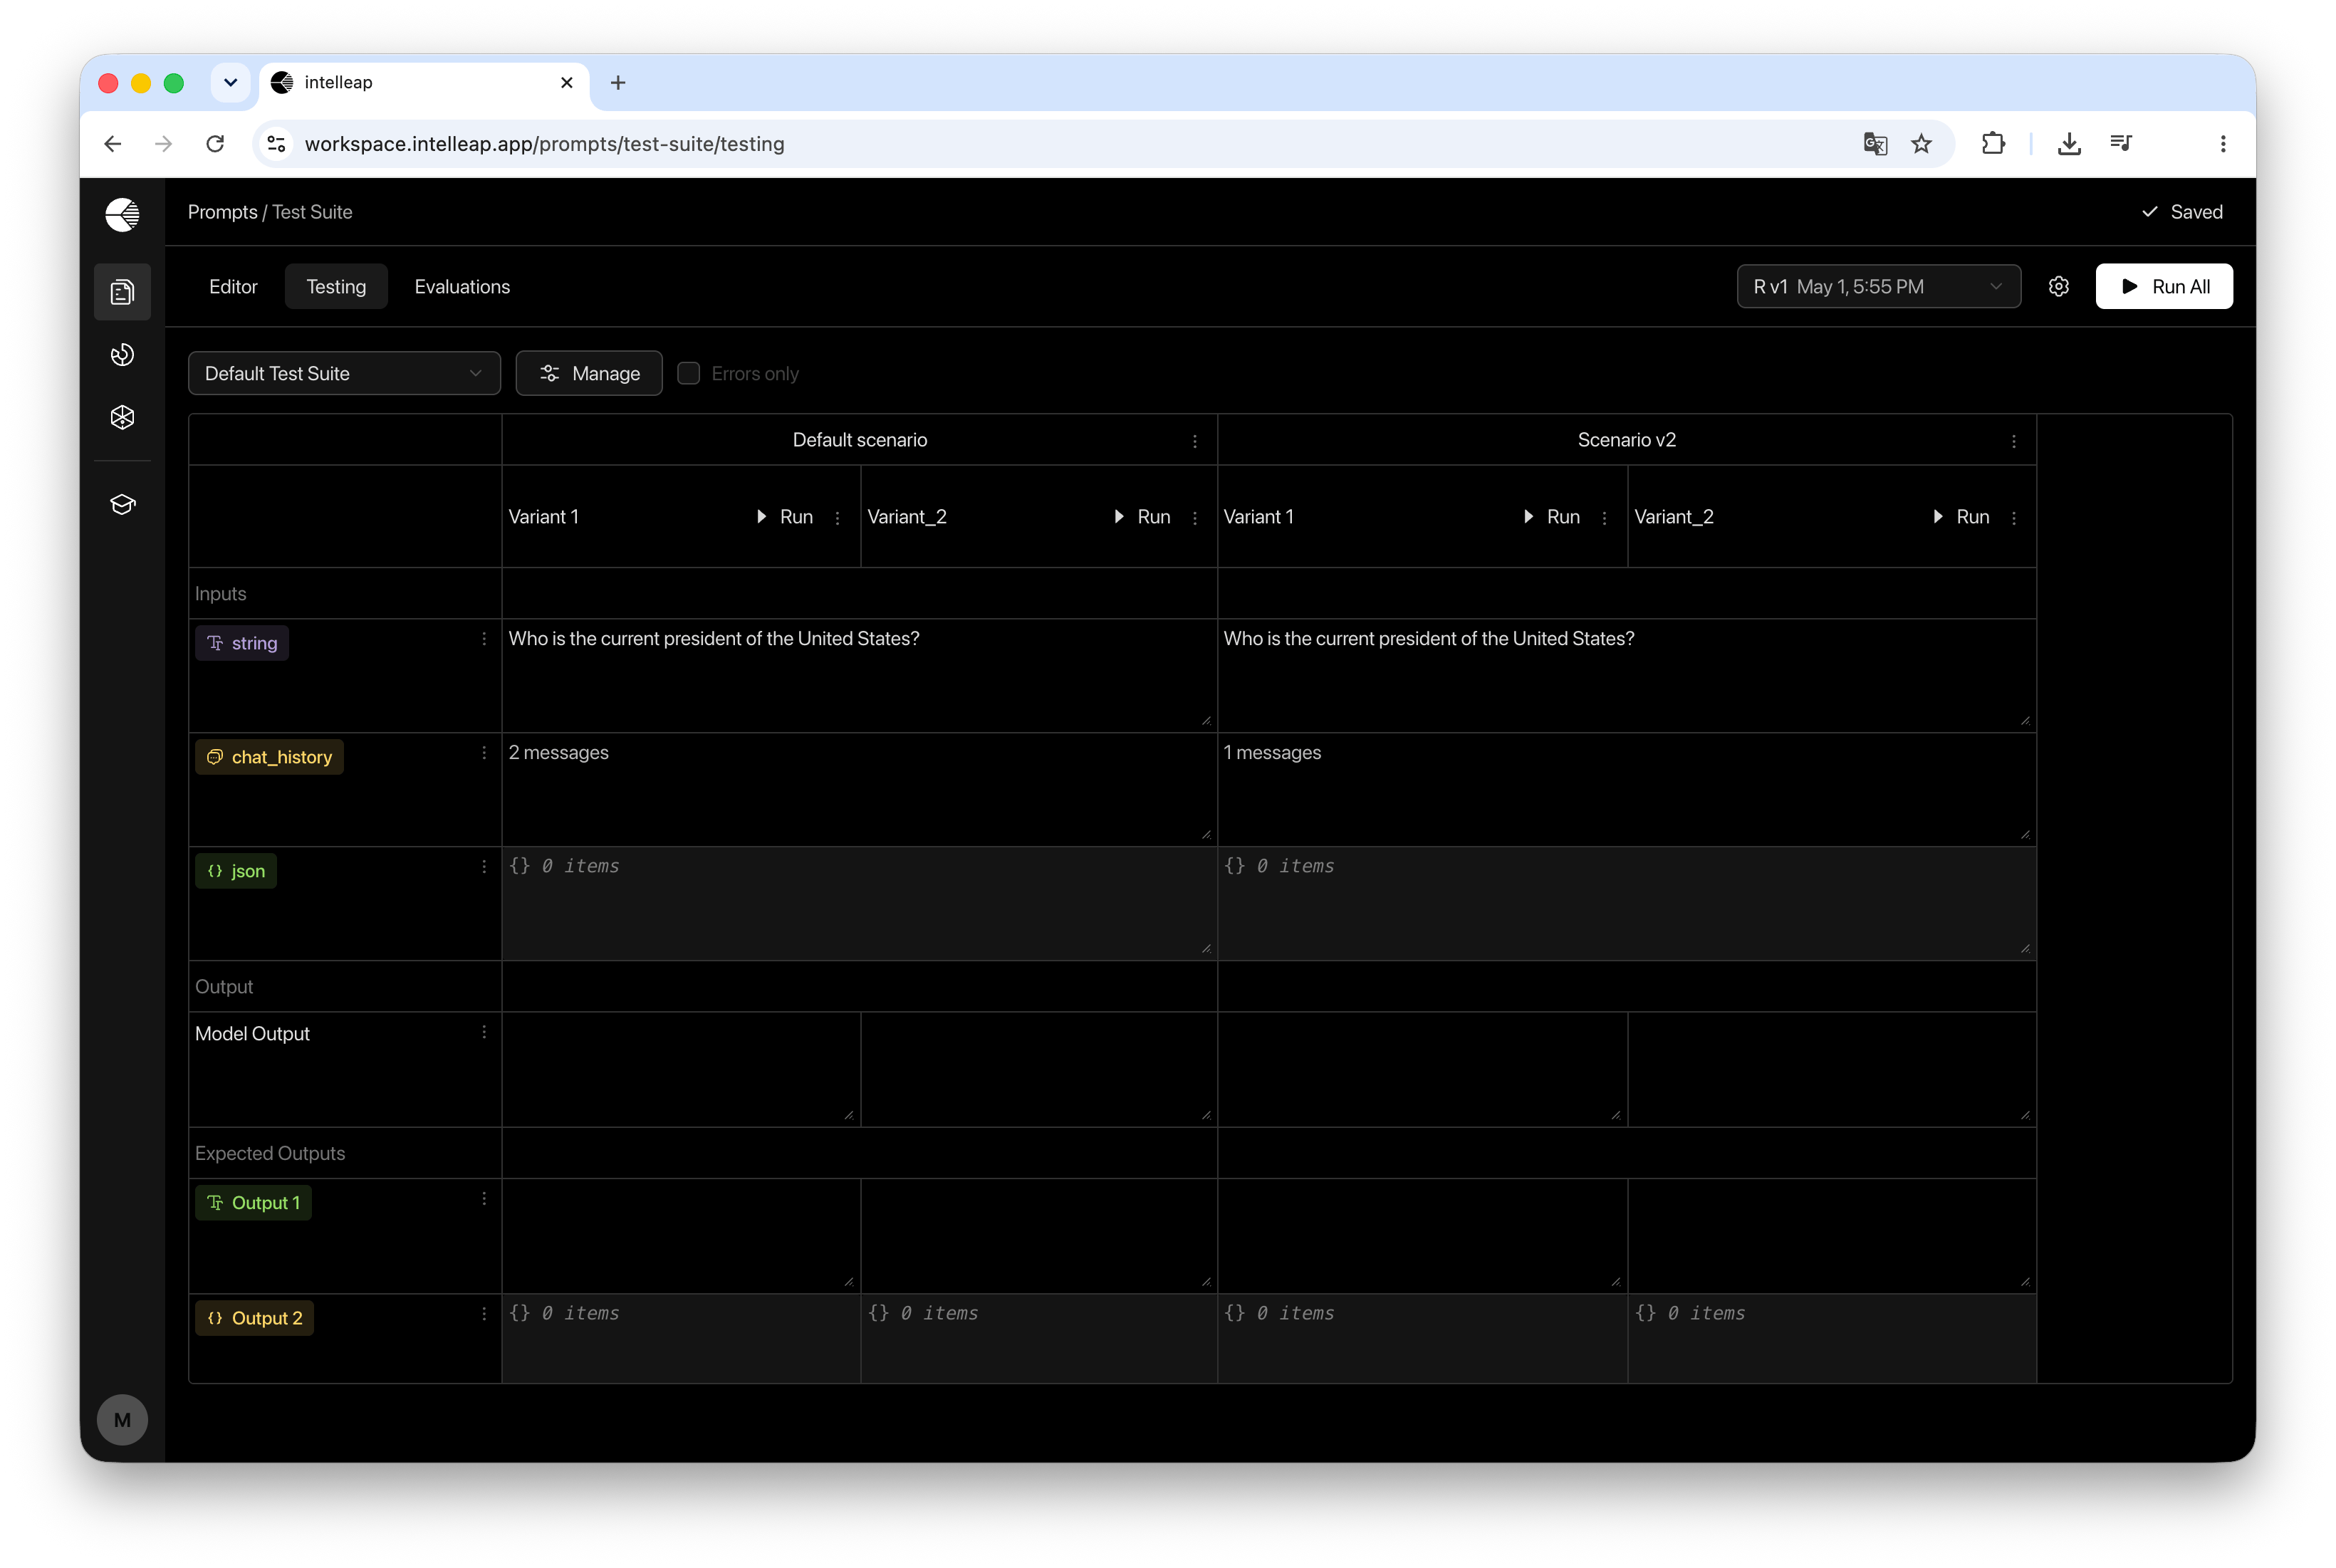 All executions are automatically recorded in the **Evaluations** tab.
For each execution, you can review:
* Input values
* Output values
* Estimated cost
* Errors
* Request and response details
The Evaluations section also provides analytics and release history.
All executions are automatically recorded in the **Evaluations** tab.
For each execution, you can review:
* Input values
* Output values
* Estimated cost
* Errors
* Request and response details
The Evaluations section also provides analytics and release history.